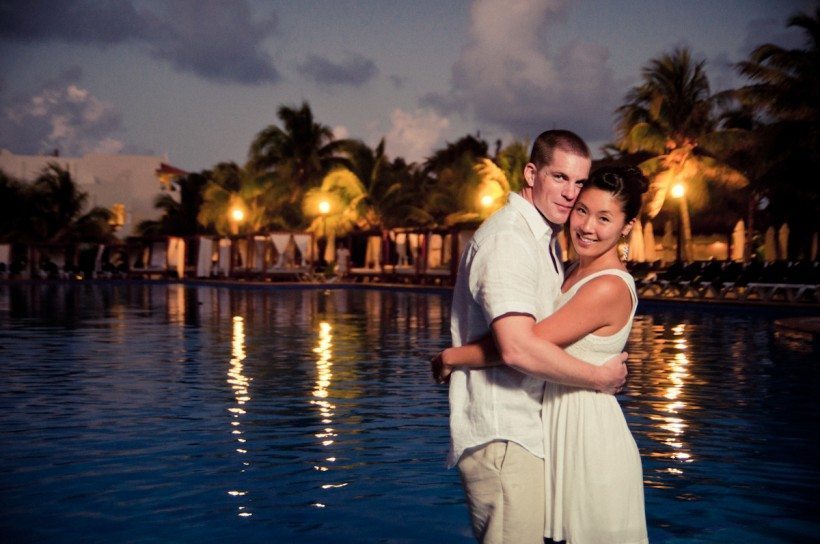
1. Wear clothing that makes you look and feel like yourself, don’t pull out that shirt that looks nice, but you NEVER wear.
2. Avoid patterns or really bold stripes as it distracts from your wonderful face
3. Don’t wear matching clothes. Please. It looks cheesy and doesn’t provide separation between you two unique individuals.
4. Bring a change of clothes if you want a different look. Maybe several depending on time frame.
5. Don’t camouflage yourself!! If we’re outside in spring, don’t wear green – if were in a concrete alley doing some grunge shots, don’t wear grey!
6. Men or women can wear jackets or other accessories to vary the look.
7. For ladies, I recommend getting hair and makeup professionally done for any session. Some photographers provide one, I have several who help with my sessions if you’re interested!
8. Mineral makeup is wonderful in photos. Regardless of mineral or not, bring some extra to touchup mid-shoot.
9. I ask everyone I shoot to meet with me several days before-hand for drinks/coffee – it sounds strange, but its the best way to get good photos as we skip the whole “getting to know each other” 1/2 hour
10. My photos are about YOU so don’t you dare act like anyone but yourself – and let me know some of your FAVORITE PLACES before hand – I’d like to shoot there!
Or how I learned to stop worrying and have tangible memories of my cherished moments in life . . . . .
“I’ll print them myself one day.”
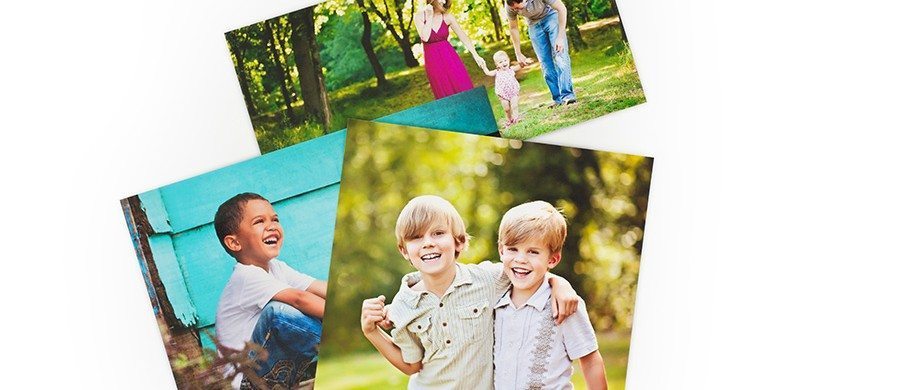
This is a common excuse for not ordering prints after a photo session. In fact, there are many excuses people use for only purchasing a disc of files. Unfortunately, these people are missing out on many fantastic benefits that come with having a print. Here are a few points to consider when ordering memories from your photographer:
Technology changes, prints don’t.
Records and 8-tracks have seen better days, so why should we think DVDs will be different? Whether we like it or not, things change and files get corrupted. One day, you may find yourself struggling to view your beloved wedding photos. Prints stay consistent and make the perfect heirloom piece in your family. And besides, you spent all that money to have photos taken, so why not keep a visible reminder above the fireplace?
“I’ll print them one day.”
Let’s be honest. You’re not actually going to get your photos printed. It will get put on your To-Do List and slowly fall to the bottom until it has been six months since your photo session. At that point, you’ve probably also permanently misplaced the disc of images. Life gets busy, so let us worry about getting your memories printed.
“Look at this beautiful… disc?”
Passing around a shiny piece of plastic at the next family gathering is not the way to grab Aunt Betty’s attention. With a print, everyone can instantly see just how cute your kids can be when they aren’t running through the house. No computer required, just immediate satisfaction.
AUTO is for amateurs.
I love printing, and I want to make your photos as beautiful as possible! Taking your files to be printed at Walgreens will leave them in the hands of someone who has no personal concern for your images. At Don Wright Designs, we have control over every aspect of each photo. We pay attention to details and make sure that your charming face matches your quality print. For those of you looking for a little more pizzazz, we also have a nice selection of materials and paper types to choose from for your images.
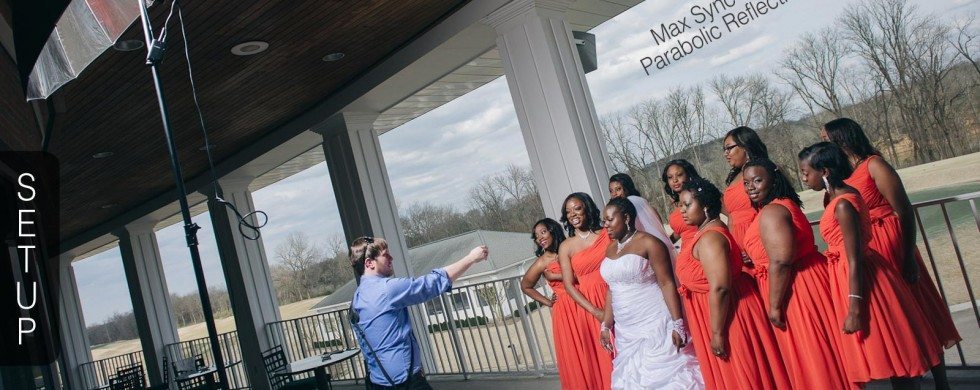
This is a quick little comparison I decided to put together tonight after tax-filing burnout kicked in. I hope it speaks for itself somewhat and will inspire you (those who don’t yet know lighting) to start learning more about controlling the light around us. As a photographer, all we have to work with is LIGHT and we can choose either to be it’s slave or learn how to harness it and coax it into doing what we need it to do to properly balance a group of bridesmaids, maybe a product you have to sell, or even that shiny bmw in on the latest billboard.
1) Is there a particular budget you’d like to stay under/around? ($400-$600, $1000 – $2000, etc)
2) What will be primary types of photographs taken? (ie: Landscapes, children playing, animal photos, travel photos)
3) What is past photography experience? (ie: ever owned a film slr? have you used point-and-shoot digitals before?)
4) Is size/weight a concern? (some larger heavier cameras have more features than lightweight, smaller cameras)
5) Is buying used something you’d like to consider to save $$$ ? (we buy many of our cameras used from reputable sources)
6) Do you plan on using any OLD lenses that you’ve perhaps inherited from a family member’s OLD camera??
7) What type of computer do you plan on using to edit/organize your images? How old is the computer?
All of these questions help us identify the best type of camera for your specific, individual needs and can also help us tailor our private photography lesson for your camera and primary usage habits.
A few nights ago we were trying to come up with some really specialized topics to promote which have been popular requests from students during their first lessons. In middle TN there are lots of budding photographers who really love stars. I’ve been asked as many times how to accurately photograph the moon and stars
Read More» I never realized how much I love teaching and sharing my knowledge with others until 2 years ago when a friend suggested that I start offering photography lessons in the Nashville area. Throughout middle school, high school and college I did some tutoring here and some speaking exercises at mock-trials and pseudo legislatures (youth ledge anyone?) but never truly sat down one-on-one with someone and shared knowledge that came solely out of my own brain without referring to some sort of manual or text.
I recently finished teaching my 168th private photography class (out of our collective 250 or so) and it was refreshing to work with someone who is an aspiring pro. Brennon reminded me so much of myself several years ago that I suddenly realized the best way to help him. . . . . I asked myself the question – “What do I wish that someone had said to me back in 2005?”
It came down to this short list of suggestions on how to improve your skills and portfolio if you’re already familiar with the basics of aperture, shutter-speed, exposure, ISO sensitivity, balancing flash with ambient, long exposure, etc. I hope these recommendations will help push you to accelerate your photo-skills at a faster-than-your-average-lull pace.
Unplug the Computer and Shoot for You.
Remember back when you used to go out and shoot photos for fun? Try. . . . come on . . . there it is! Maybe 2-3 or even 7 months ago, right? Doesn’t it seem like just yesterday photography was your favorite hobby and you spent all your free-time with a camera in your hands? Perhaps you’re like me and somewhere along the lines got a little bit lost, and started associating our moment-capturing-machine (read:camera) with work and paying bills – while somehow losing that memory of it being your favorite past-time. It’s always a sad moment when you realize that you’re in a weird funk that causes you to desire anything BUT holding a camera during your free-time. I’ve been there. Many times. I’m also quite amused that (in my case at least) all it takes is buying some new piece of glass, or lighting modifier to inspire some spontaneous, fun, explorative shooting. This type of shooting is sometimes the most important – when you’re not shooting to please ANYONE but yourself – it’s when you smile for YOU and not because you know you’re client is going to love that photo of themselves, but because you’ve shot something that you find valuable or exciting. Remember that feeling?? It’s a shame that it sometimes takes buying new gadgets or accessories to kick you out from the computer screen and out into your neighborhood with the diopter glued to your face. Sometimes we need to rekindle the old flame, reconnect on a personal level – with our cameras and our passion . . . . . . creating images. Remind yourself that you chose this profession because you LOVE it, and think how lucky you are to pay your bills with your camera.
Painters Tape
Painters tape? No, I’m not suggesting to tape your ears closed to enhance your vision and “use the force” I’m only suggesting that the next time you’re shooting something for yourself (see further down the list) simply tape off your screen so you can’t look at the results after each shot. You know, like our parents, and their parents and Ansel Adams, Manuel Bravo, Karl Blossfeldt, Bill Brandt and many more of the greatest photographers HAD to do. You’ll find that this will push you to take more time doing everything. You’ll pay more attention to your metering, you’ll think more and work harder on each shot, and after practice, your skills will improve 10x as fast as they would shooting “chimp style.”
Get Rid of the Gear
Sell it all. Okay – don’t really sell all of it, just pretend for one week that you don’t have all of it and pick your favorite (or only) body and ONE lens (hopefully a PRIME lens) to shoot with. Carefully apply your painters tape on the screen and go shoot without that bag-full of options weighing you down. Sometimes we work better with fewer decisions/options – it’s no longer about “which lens” or things like “which light modifier” instead the questions become more similar to “how far back to I walk” or “what angle” and “how can I best use the available light” (that last one was for me, I went through a long period of thinking that strobes were the end-all, be-all of good photographs – it all came down to a CONTROL issue I have. That’s another blog entirely.
Stop Emulating Other Photography Styles
I know it sounds crazy, but sometimes when we all pay such close attention to so many photo forums, pinterest, tumblr, flickr feeds, etc – all of our work ends up blending together as a mixture of everyone else’s styles. I know that I, for one, tend to go through phases where I see some work I like and I do my best to start shooting “that way” or “his/her way” in an effort to reinvent my style. I know I’m not the only one who does this – I think if you look back at your work over the weeks/months/years you might see the same thing. Go out and shoot what’s in YOUR mind and creative juju – not what you saw on some photo blog somewhere that you wish your work looked like. Contrary to what you believe, your work IS and WILL BE unique if you stop chasing the trends so quickly. My personal style has gone from Natural light (basic, beginner) to suddenly deciding that I MUST learn to use strobes > then I shot nothing natural light for a long time, I thought EVERY photo was better with some off camera lighting. Once I could afford some nice glass (read: 1.4 aperture) then it was suddenly bokeh bokeh bokeh and everything I shot was wide open with tons of bokeh. Same goes for our processing habits.
Start Emulating Other Photography Styles
(places foot in mouth)
For Practice. Practice. I write this carefully considering the paragraph above. Sometimes we get in slump where we look at our work and it all looks the same, then we start the downward spiral that is any artist’s self criticism, doubt, dissatisfaction. Zack Arias’s video comes to mind. It’s at these times that sometimes it’s GOOD to stir the pot and start looking at other work and emulating it NON PROFESSIONALLY. All I mean is that go out and learn to shoot in as many “styles” as you can. Once you know that you can shoot confidently in that “style” after practice and patience, then move on and learn another. This goes only for developing your skills. Once you’ve really gotten strong fundamentals in strobist style, available light, black and white, and can emulate or at least breakdown how most photos were taken, then it’s time to start the long winding journey that is developing YOUR style, not the compilation of all the style’s you’ve pinned on Pinterest.
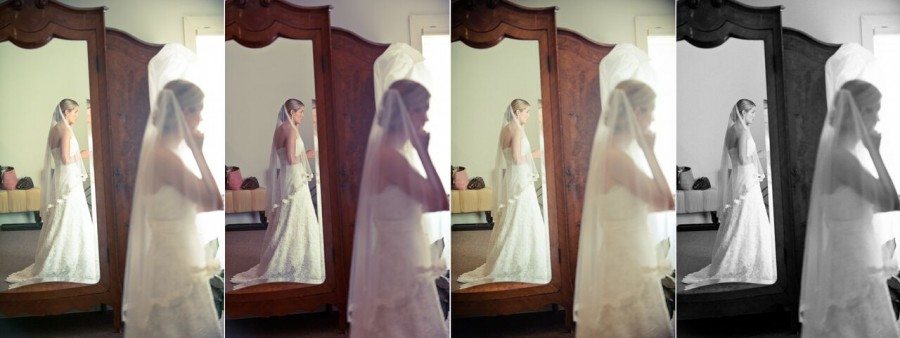
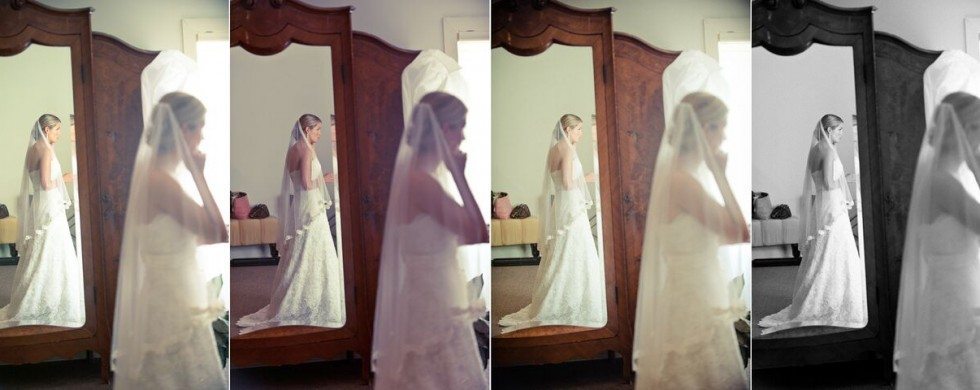
There’s lots of fuss about image processing in modern portrait and especially “wedding” photography. Processing used to be determined by careful and sometimes lucky film selection, but is now the product of experience, dedication, creativity, software, free-time and lastly . . . . taste.
See the image above? Isn’t it interesting how different each “treatment” makes the image look? We use our own creative opinions of what images would look best with what type of treatment, and 99% of the time, client’s LOVE them. Keep in mind though, that if you favor a particular “look” that you’ve seen here or anywhere else, let us know so we can do our best to maintain that look throughout your edited images!
